New Product
1. Button for adding a new product
To add a new product, it is necessary to select the button Add product, it is located immediately above the list of all products, accessible from the page: Catalogs > Products

2. Fill in main information
Name - the product name is filled in. This name will be displayed among the others in the product list and will be used as the title of the product detail page.
Producer - Here one of the already saved producers can be selected from the list. If the desired is not listed here, you can add it under "Catalogs > Producers > Add Producer.
Additionally, it is possible to create a producer directly when creating a product. This saves one step and there is no need to go back and forth between different menu items.
Item number - An individual product number can be added here.
Description - In the description, the customer can be presented with an overview of the product and detailed information about it. The data recorded here is displayed on the product details page.
The following fields must be completed before saving in order for the product to be created successfully:
- Name
- Price (gross)
- Price (net)

3. Fill in additional information
After the main information about the product is filled in, to publish it, press the Save button.
Once the product is saved with the required information, the other options: "Specifications", "Advanced Pricing", "Variants", "Layout", "SEO" and "Related Products" are available and can be accessed through the above tabbed navigation. Using arrow navigation, you can switch through the pages of the navigation and thus reach pages that are not directly visible.
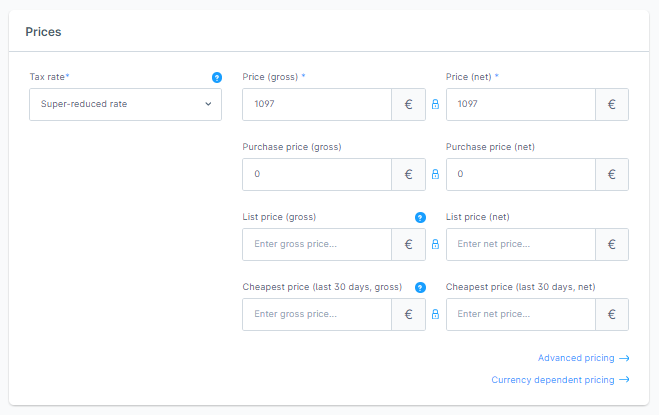
4. Prices
Basic information and a standard price for the product are set here.
Additional pricing details may be added subject to certain conditions.
Tax rate - when creating new products, the default tax rate is automatically stored here as a default. Set the desired tax rate. For most countries, one standard tax rate and up to two reduced tax rates are preset. You can see the exact tax rates in the settings. There you can also adjust the pre-filled tax rates for this input field or the tax rates in general, create additional ones and assign them to countries. Within customer groups, you can define whether prices are calculated gross or net. If set to net, taxes are calculated on the order.
Price (gross) - gross price incl. VAT.
Price (net) - net price excluding taxes.
Purchase price (gross) - If the purchase price is preserved, this can be taken into account at pricing.
Purchase price (net) - net purchase price.
List price (gross) - RRP of the client through the list price, for example.
The listing price needs to be higher than the product price to show.
List price (net) - In addition to the gross list price, the net list price can also be maintained.
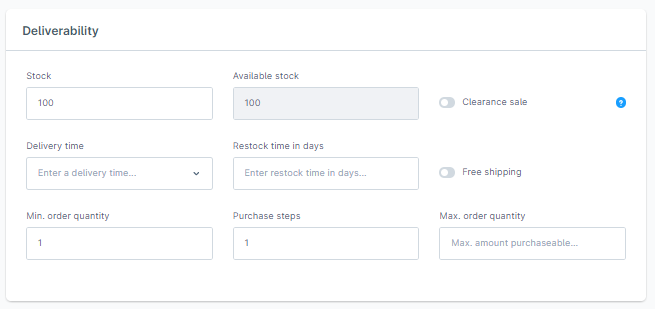
5. Deliverability
Stock - here you can fill in how many units of the product are currently available. Once the order status is completed, the stock is reduced.
Available stock - stock shows the quantity of the product that is still available. This value is obtained from on-hand inventory minus open orders. When the customer completes the order, it is removed from the availability, but available stock remains. Once the order status is changed to "completed", the order is taken out of stock. On the other hand, if the order is cancelled, it is added back to the stock.
Delivery time - in the delivery time you indicate how long approximately it will take the product to reach the customer. If a shipping time is specified in the product, it overwrites the shipping method's shipping time.
Restock time in days - indicates how long it takes to restock a sold-out product. For products that are not in stock, this time is added to the delivery time.
Free shipping - if checked, the product will be shipped for free. This means that the product itself is free to ship and does not affect any other shipping calculations that may follow.
Minimum order quantity - the product cannot be added to the cart if the minimum order quantity is not reached.
Purchase steps - here you can set the increments in which the product will be offered. For example, a step of 2 means that your customers can purchase 2, 4, 6 products, and so on, but not 1, 3, or 5.
Maximum order quantity - the maximum quantity of the product that can be ordered. This will limit the quantity a customer can order of the given product per order.
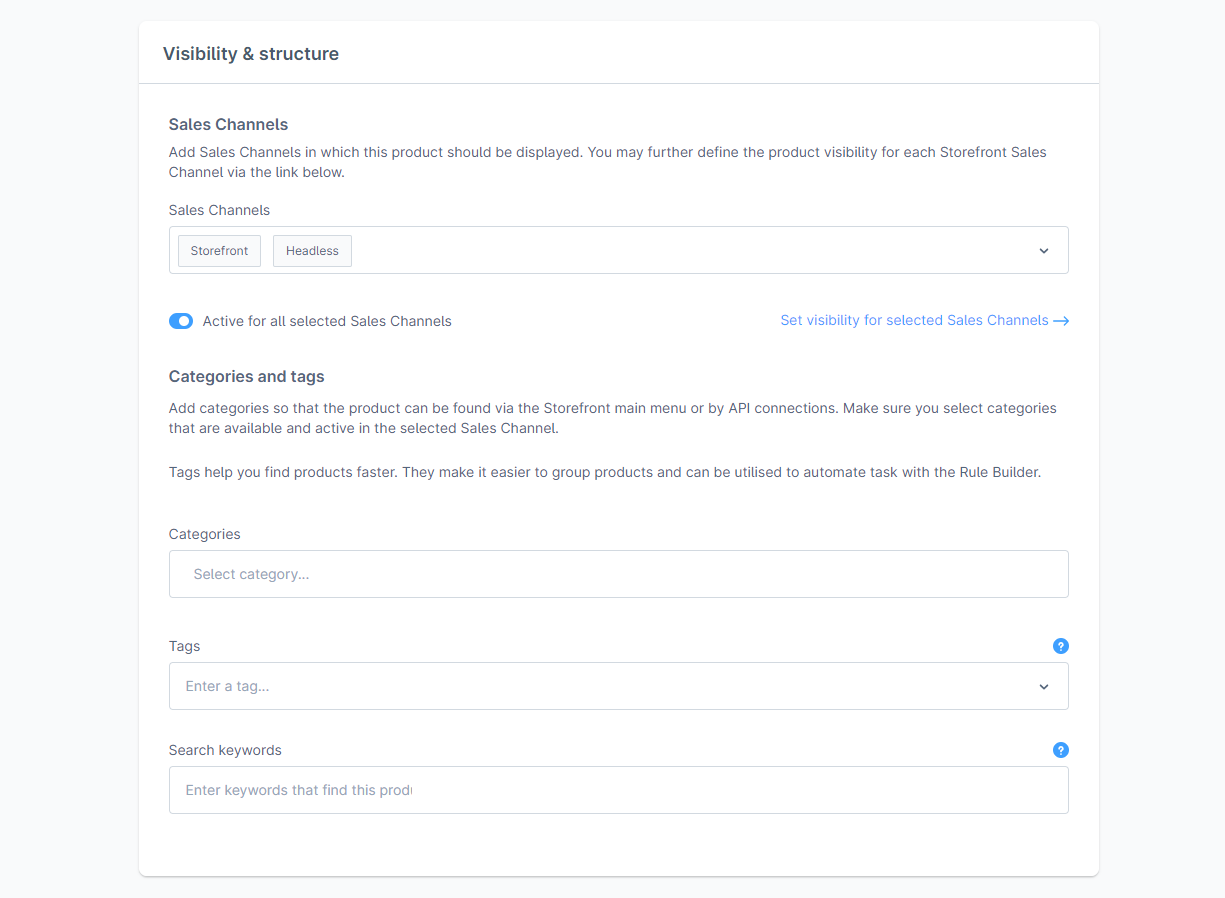
6. Visibility and Structure
Categories - here you can assign one or more categories to the product. In the store, the product can be found in the corresponding categories, for example, by using navigation or a category list.
Tags - allow you to store keywords for your product. To add a new word, simply write it in the field and confirm with Enter.
Search Keywords - the words entered here will be added to the product's search index. The product can also be found using these words. Each entered word is saved by pressing Enter.
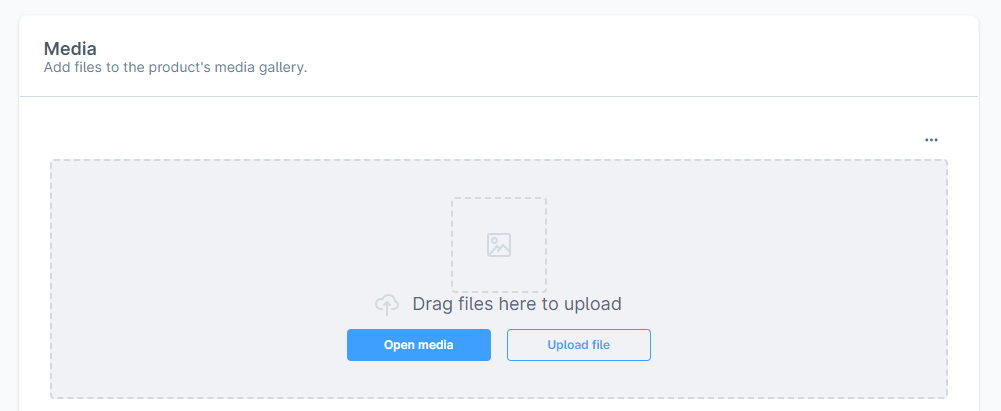
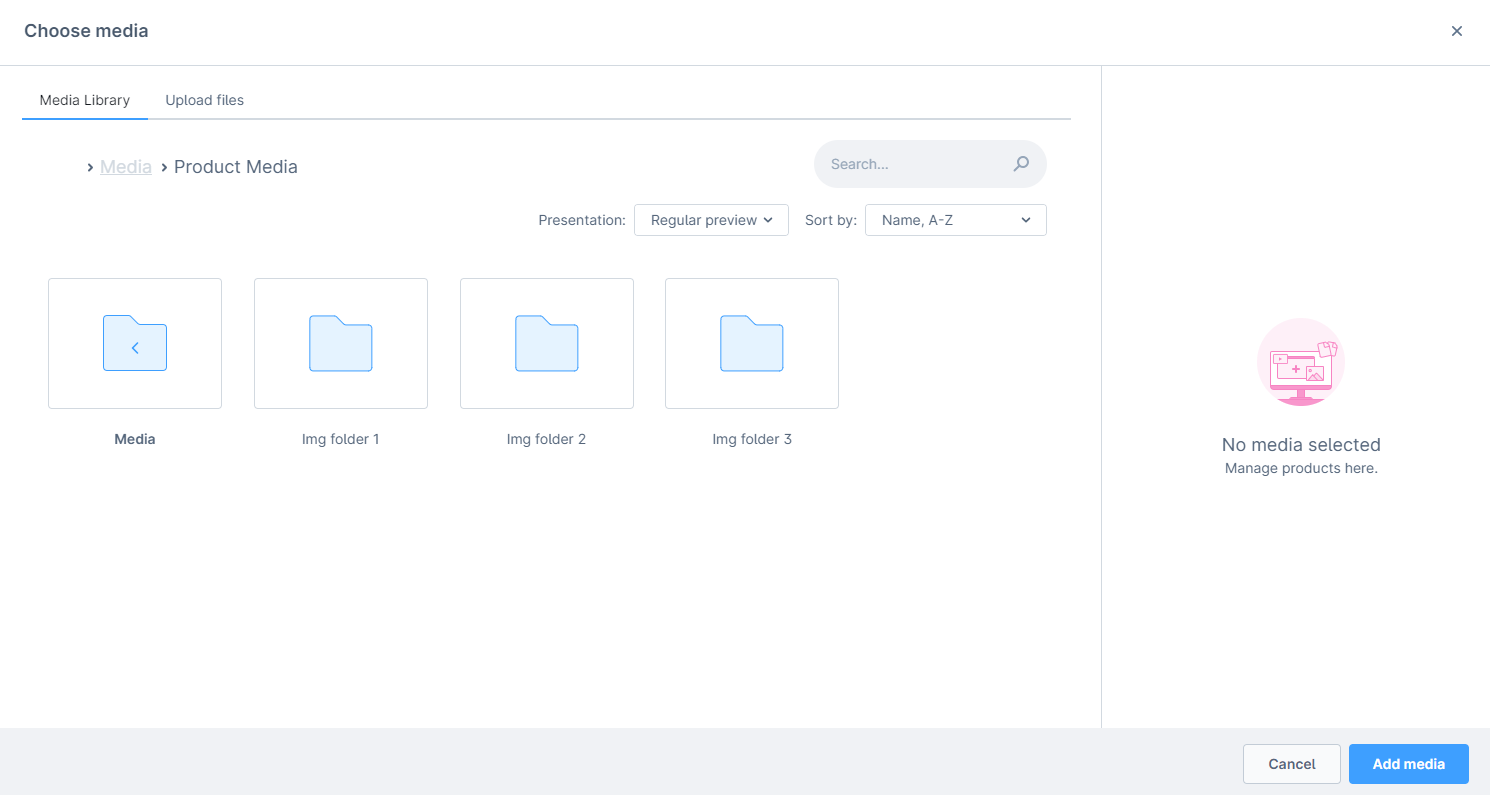
7. Images and Other Files
In the "Media" section, you can assign desired media to the product, such as product images. You can also designate which image to use as the main one, for example, for the product list. Additionally, you can add new files from your computer or from the internet (via the "..." menu).
8. Specifications
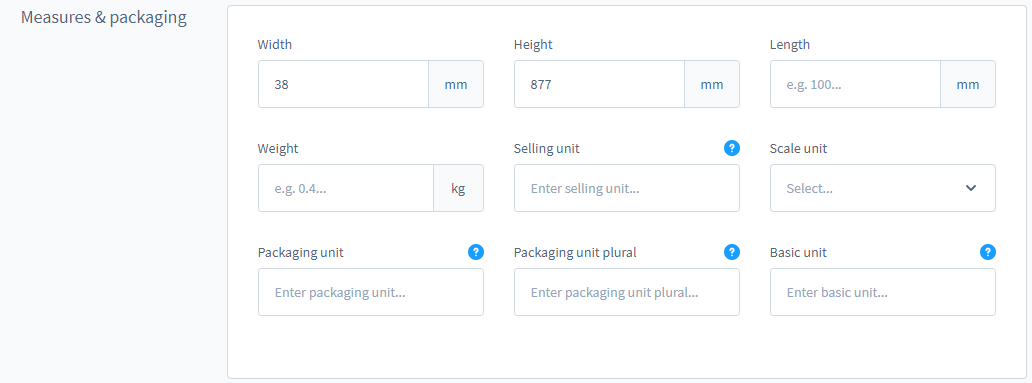
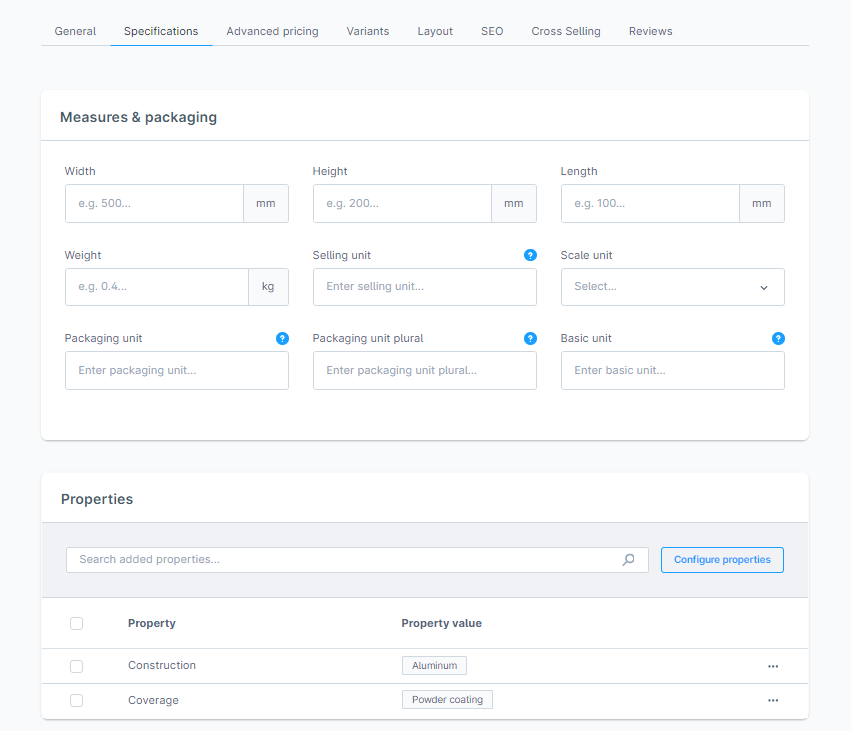
Dimensions:
Width/Height/Length and Weight - here you can enter the product's dimensions and weight. This information can be displayed on the product detail page and can be used for calculating shipping costs.
Sales Unit - the quantity of the product, for example, 700 ml or 500 grams.
Measurement Unit - here you can select the unit of the product. This can be a piece or a bottle. You can save the available units in the administration from: Settings > Shop > Measurement Unit.
Packaging Unit - indicates how the product is delivered, for example, in a carton or bottle. This information appears in the product quantity selection field.
Packaging Unit Plural - if the plural form of the packaging unit differs from the singular, you can enter it additionally here. For example, for the packaging unit "bottle," you can enter "bottles." This information will be displayed in the quantity selection field for quantities >1.
Base Unit - defines the reference specification, for example, price per 100 grams or per liter.
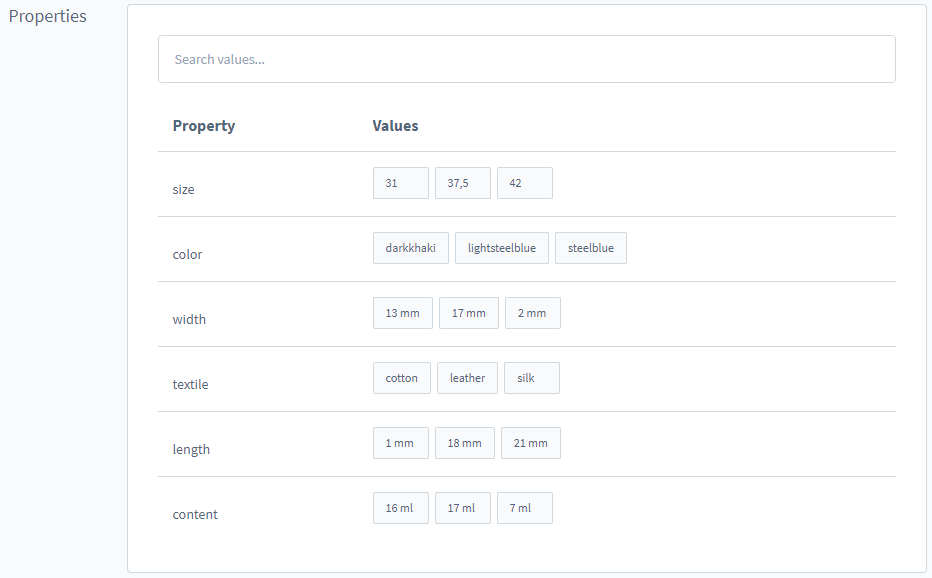
Properties:
The properties offer you the possibility to provide your products with filterable information.
Under Catalogues > Properties, you will first find an overview of the already available properties with the corresponding property values and an (optional) description. It is also shown here whether the properties are displayed in the product filter or not.
More information about properties can be found here.
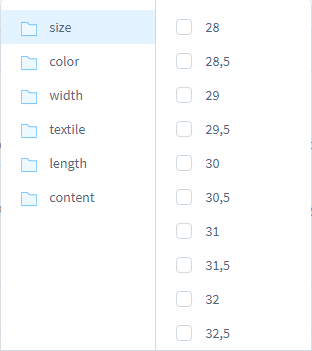
To add properties to the product, first select "Search for values," which will open a menu with the available data sets.
In this menu, all available properties are displayed on the left side. By clicking on one of the properties, the corresponding options are shown on the right side, which can be assigned to the product by clicking the respective checkbox for the options.
Alternatively, you can search for the desired property or option in the search field and then activate it by checking the checkbox.
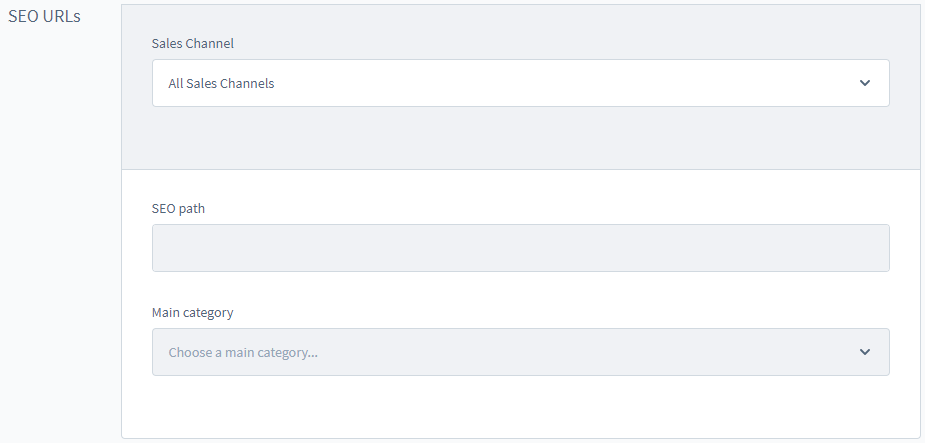
9. SEO
Meta Title - Currently, the meta title should not exceed approximately 70 characters; otherwise, it may be forcibly shortened in the search engine listings and similar.
Meta Description - The current length of the meta description should be around 130 to 160 characters. If the description is longer than 160 characters, it may be shortened on the search results page.
SEO Keywords - You can additionally set keywords.
It is recommended to use a single canonical URL for all variants. This option is visible only if the product has variants. In such cases, you can specify that all variants use the same canonical URL. When this option is enabled, you can choose which variant to use for the URL - "Canonical URL Variant."

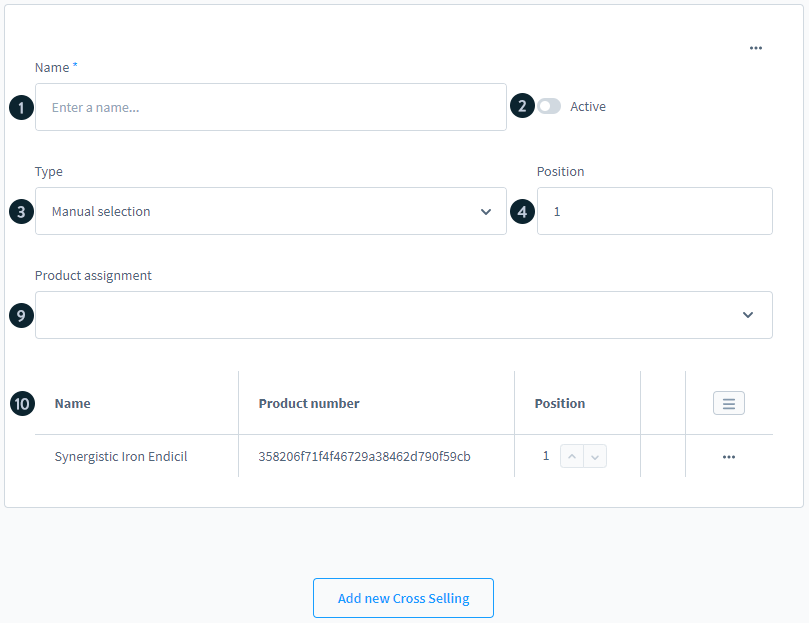
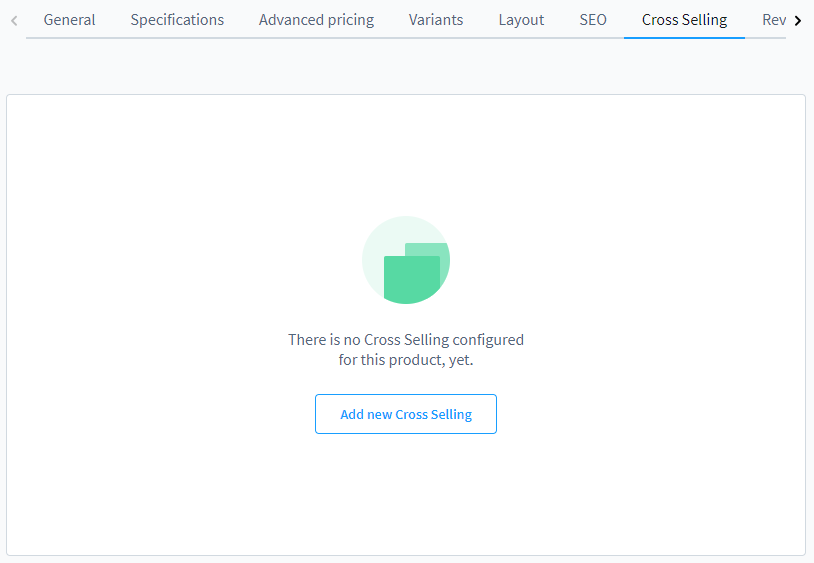
10. Cross-Selling
You can configure an article recommendation for your article using Cross-Selling, e.g. to display the matching accessories directly on the article detail page.
To enable cross-selling of an item, you must add a new cross-selling product.
In the overview you can first enter the Title (1) of your cross-selling, which will be displayed in the top of the cross-selling list of products.
Use the Active (2) button to determine whether the cross-selling should be displayed for the product or not.
In the drop-down list Type (3) you should to choose Manual assignment. With manual assignment it is possible to select a single product for cross-selling.
After selecting manual assignment, the view of the window changes. The options Title (1), Active (2) and Position (4) remain the same, but other options, such as Sort, Maximum number of products and Open preview, are completely omitted for manual selection.
In the new drop-down list Product assignment (9) you have the possibility to select one or more products of your shop to be added to the cross-selling. As soon as you have selected at least one product, it will appear further down in the view (10).
When all Cross-Selling have been added, select the "Save" button to save the changes.