Categories
1. Category overview
In the category management you administrate the category structure of your shop. Categories are the menu items in the main navigation but also in the service navigation or the footer navigation.
You can find the module under Catalogues > Categories.
On the left side you will find the category structure displayed as a fold-out menu. There you have the possibility to change the sorting by drag & drop - this is possible on every category level and you can also move a category into another category as a subcategory.
As mentioned at the beginning, the categories are also used for footer navigation and the service menu. For a clear administration it can be useful to work with two or three category trees, as you can see on the screenshot above.

Context menu
For each category, the context menu can be opened with the "..." button, which can be used to execute further functions.
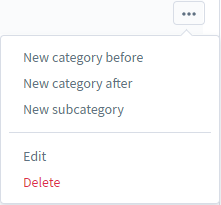
- New category before: Creates a new category on the same level before the selected category
- New category after: Creates a new category on the same level after the selected category
- New subcategory: Creates a new category a level below the selected category
- Edit: Opens the display on the right side for editing the selected category
- Delete: Deletes the selected category including all subordinate categories
2. Create category
To create a new category, open the context menu of an existing category and select one of the menu items New category before, New category after or New subcategory.
Afterwards a mask will be displayed in the menu at the appropriate place, in which you enter the name of the new category and confirm with the check mark.
3. Assign products to the category

You can assign products to the category by using the product assignment.
Type (1): You can either fill the category manually or have it filled by a dynamic product Group.
Products / Dynamic product group (2): If you have selected manual selection as the type, you can assign the products manually here. If you have selected Dynamic product group as the type, select the dynamic product group you want to assign here.
Product list (3): Here you see a list of the currently assigned products.
Another option to add a product is from: Catalogues -> Products -> Specific product
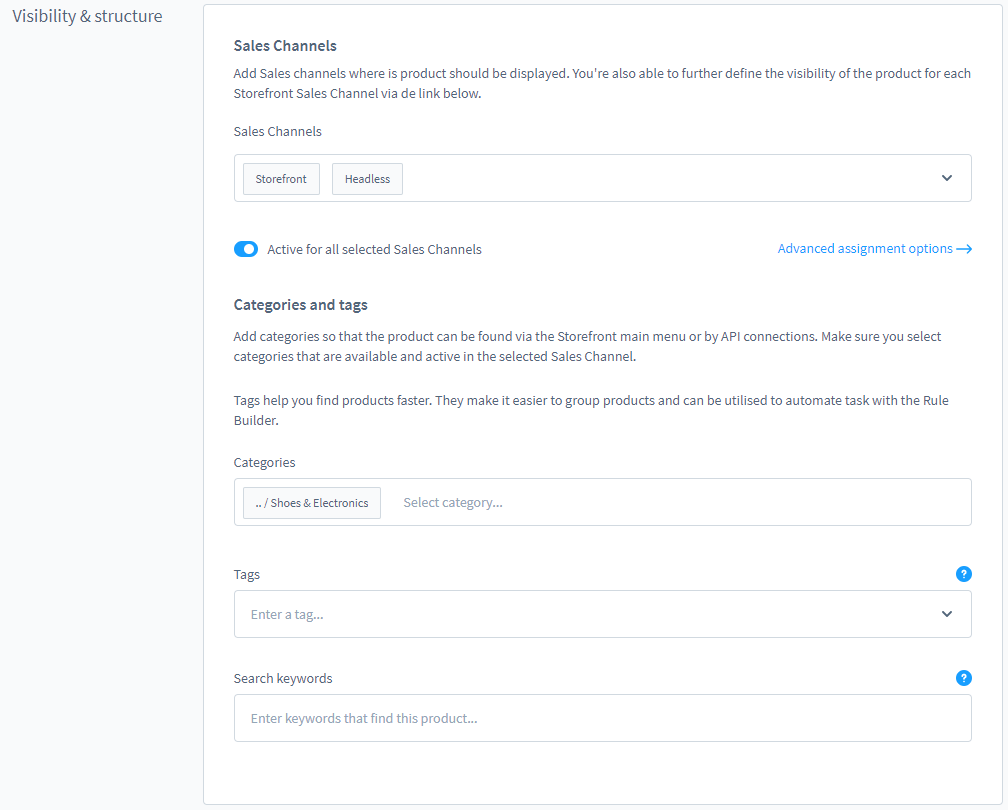
Assign the product to one or more of the categories here in the section Visibility & structure.
In the store, the product can then be found in the corresponding categories, e.g. using the category tree.
After making all the desired changes press Save button to save.
4. SEO
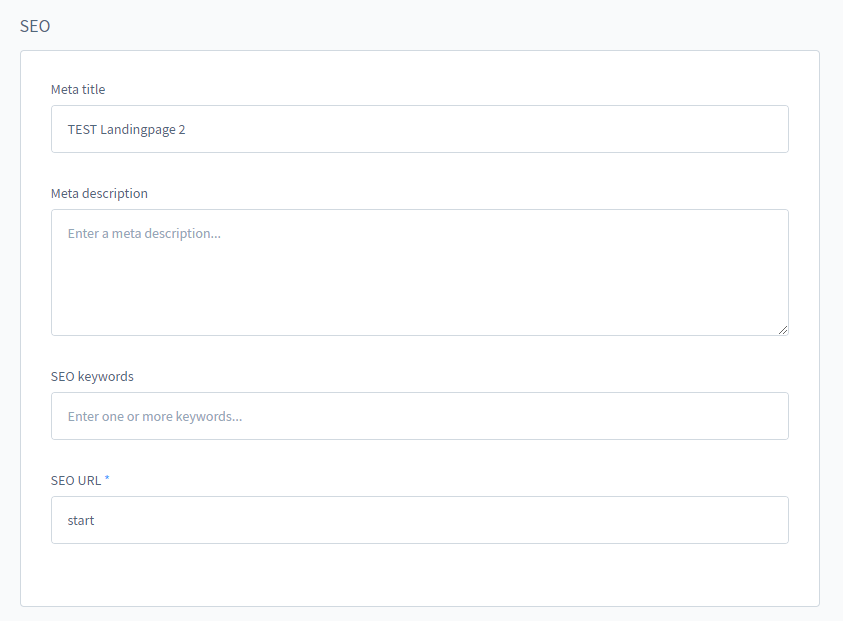
When selecting from the "SEO" menu, a form is visualized with fields for filling in an SEO title and description for the category.
The SEO URL is a mandatory field. This is the URL under which the page can be called up directly. If you enter the value start here, for example, as in the screenshot, the URL of the landing page is www.mysaleschannel.com/start, depending on the sales channel.
By default, the SEO path is the category name separated by "-" between the individual words.
